Columns, also known as fields, allow users to enter and calculate details displayed within a procurement schedule. Columns are organised into groups and can be hidden, filtered, and sorted.
Users will need the Edit Procurement Schedules permission to create and manage columns.
- The first column is the primary column, denoted as the Title. Primary columns cannot be moved to the left, deleted or hidden by default.
- The first column or the primary column is frozen by default.
Column names are unique. If you are adding a new column based on a template, for example, Budget, a number will be added alongside the column name if there are duplicate columns. (e.g. Budget 1, Budget 2)
Creating a column
To create a column, there are two options:
- First option: Click the plus icon in the column group name on hover and select Create new field or a column name based on the available templates.

- Second option: Click the small down arrow in the column name where you would want to add the new column and select these options.
- Insert Field to the Right - Select this to add a column to the right.
- Insert Field to the Left - Select this to add a column to the left.

Columns are the ones located in the second row of the template.
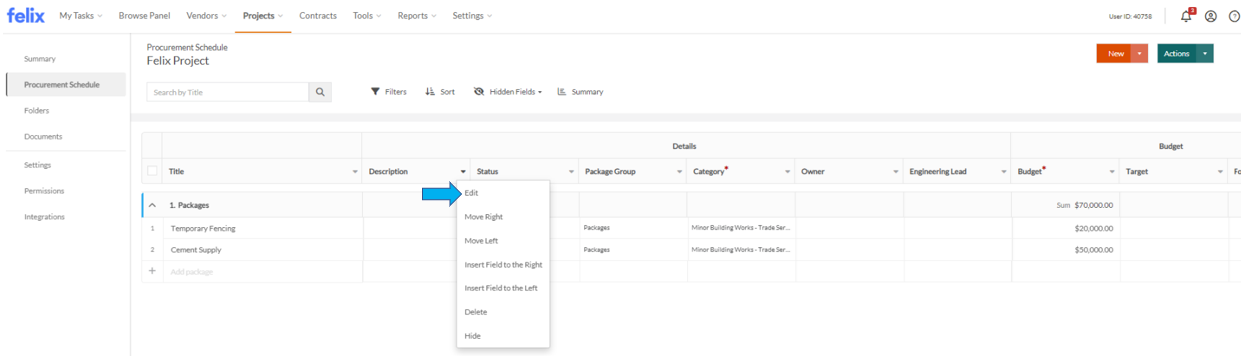
Editing a column
To edit a column:
- Click the small down arrow in the column name.
- Select Edit.
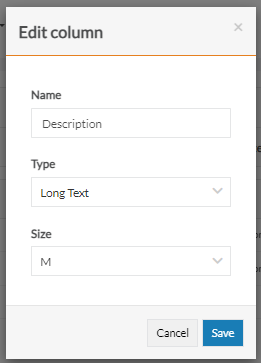
- Update the following based on your preference:
- Click Save.
Reorganising a column
To reorganize a column:
- Hover over the column name.
- Click the small down arrow that appears on hover.
- Select Move Right from the dropdown menu if you want to move the column to the right.
- Select Move Left from the dropdown menu if you want to move the column to the left.

You cannot move columns between column groups.
Deleting a column
To delete a column:
- Hover over the column name.
- Click the small down arrow that appears on hover.
- Select Delete from the dropdown menu.

- Click Submit to confirm the deletion.

Deleting a column will delete the data associated with the column for all packages in the schedule and there is no option to restore it.
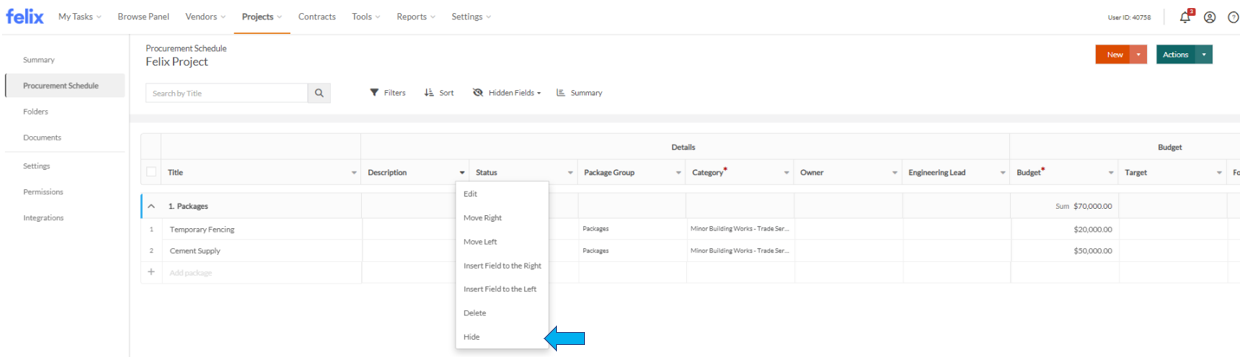
Hiding a column
To hide a column:
- Hover over the column name.
- Click the small down arrow that appears on the hover.
- Select Hide from the dropdown menu.
Unhiding a column
To unhide a column:
- Click the Hidden Fields link beside the search bar.

- Select the column name/s you want to unhide by clicking the checkbox to uncheck. You can also use the search bar to search columns and click the checkbox to uncheck. This will unhide the column.

The number in brackets shown in the Hidden Fields link tells you how many columns were hidden.
Refer to Column Types and their Settings for the list of column types.